Virtualization Adapted Adapting Business Processes for Virtual Infrastrcuture (and vice-versa)

2010/03/10

HyTrust Appliance 2.0 Released

Filed under: virtualization — Tags: , , , , , — iben @ 09:32

HyTrust Appliance 2.0 is available. Building on the successes of 2009, which included our initial product launch and numerous awards, we’re happy to see the streak continue into 2010 by delivering a major new release that will empower enterprises to capitalize on the wave of datacenter virtualization and accelerate efforts to virtualize tier-one applications. The features available in HyTrust Appliance 2.0 deliver true enterprise-class policy management and access control capabilities to virtual infrastructure. New features include the following:

* Root Password Vault: Locks down privileged host accounts and provides passwords for temporary use to enable time-limited privileged account access. Root accounts on hypervisors are extremely powerful and, as a consequence, can create a significant liability if not kept out of the wrong hands. With the aid of Root Password Vault, all root account access is attributable to an individual and every action is logged, providing far greater visibility and accountability.
* Federated Deployment: Secure distributed system architecture allows for automated replication of policies and templates across multiple HyTrust Appliances as well as geographic boundaries. For larger enterprises with multiple datacenters and collocation facilities, Federated Deployment of HyTrust Appliances ensures consistency of controls across the entire infrastructure.
* Virtual Infrastructure Search: Enables quick and easy accessibility to all virtual infrastructure objects, policies, and logs within HyTrust Appliance.
* Remote API: Interface to remotely access and automate the administration of the HyTrust Appliance. Provides the greater scalability demanded by large, enterprise-wide deployments of virtualization.
* Object Policy Labels: Creates a policy categorization structure, similar to “Web 2.0 tagging” for virtual infrastructure objects, which enables better organization and tighter, more consistent controls. Object Policy Labels enable access, network segment, and zoning policies, which allows administrators to dictate which virtual machines are allowed to connect to which network segments or hosts via RuleSets and Constraints.
* Router-Mode: a deployment option where all VMware management traffic is forced to flow through the HyTrust Appliance. HyTrust Appliance acts as a router for the “protected” management subnet and ESX/ESXi hosts and vCenter Server use HyTrust Appliance as their default gateway. This adds yet another flexible deployment option to the other existing options, ensuring the HyTrust Appliance will easily adapt to any enterprise architecture.

Along with the new capabilities delivered in 2.0, we’d like to introduce you to the new editions of HyTrust Appliance:

* Community Edition is a free version of the product that supports up to three hosts.
* Standard Edition supports an unlimited number of hosts and offers more flexible deployment options.
* Enterprise Edition supports an unlimited number of hosts, offers more flexible deployment options, supports federation of multiple HyTrust Appliances, enables privileged account management via Root Password Vault, allows two-factor authentication, and offers a remote API for additional management flexibility.

You can download the Community Edition of HyTrust Appliance at http://www.hytrust.com/community.

2009/10/22

VMware-ESX-versus-ESXi

Filed under: virtualization — Tags: , , , , , , , , — iben @ 12:06

From http://www.vmware.com/pdf/vsphere4/r40/vsp_40_esx_server_config.pdf <— look on page 98 or the VMware ESXi Configuration Guide

Network Attached Storage

ESX supports using NAS through the NFS protocol. The NFS protocol enables communication between an NFS client and an NFS server.

The NFS client built into ESX lets you access the NFS server and use NFS volumes for storage. ESX supports only NFS Version 3 over TCP.

You use the vSphere Client to configure NFS volumes as datastores. Configured NFS datastores appear in the vSphere Client, and you can use them to store virtual disk files in the same way that you use VMFS-based datastores.

*** NOTE: ESXi does not support the delegate user functionality that enables access to NFS volumes using non- root credentials.

Also see these links for more info on read only capabilities for different licenses.

http://partnerweb.vmware.com/comp_guide/docs/vSphere_Comp_Matrix.pdf

On the ViOPs site there is a comparison matrix of ESXi/ESX in case we’re asked ‘which one should I use?’.

VMware ESX and ESXi 4.0 Comparisonhttp://kb.vmware.com/kb/1015000

VMware ESX and ESXi 3.5 Comparison – http://kb.vmware.com/kb/1006543

RCLI is limited to read-only access for the free version of VMware ESXi. To enable full functionality of RCLI on a VMware ESXi host, the host must be licensed with VI Foundation, VI Standard, or VI Enterprise.

http://www.vmware.com/products/vsphere/buy/editions_comparison.html

Comparison of product offerings for vSphere 4.0 and VMware Infrastructure 3.X – http://kb.vmware.com/kb/1010579

2009/08/01

VMware ESX Patch Updates and Release Levels

Filed under: virtualization — Tags: , , , , , , , — iben @ 11:11

VMware makes periodic updates to the ESXi Installable version you can download. This page was created to help track and locate those.

VMware Infrastructure Client

Use these numbers to determine when a system was patched last and to make sure the VMware Infrastructure Client is the right one.

Best Practice:

ESXi: Run the VMware Infrastructure Update tool from a windows management station with the VMware Infrastructure Client every month.

ESX: Use vCenter Update Manager to scan and remediate ESX hosts when new security patches are available.

How to Check the Version Numbers:

  1. Download the VMware Infrastructure Client from the Web User Interface.
    For example: https://ESX-HOST-IP-ADDRESS/client/VMware-viclient.exe
  2. Start the VMware Infrastructure Client
  3. Click the Help Menu
  4. Select “About”
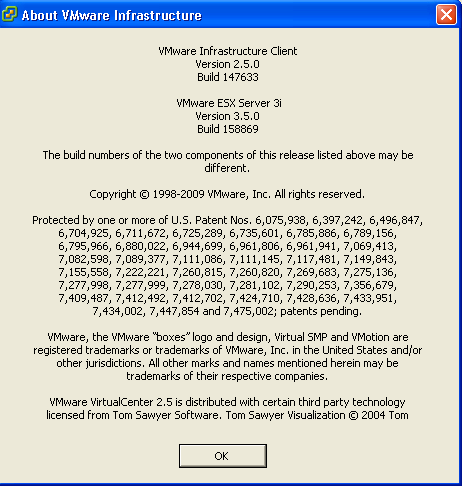
  5. Note the Version and Build for both the Client and Server.
  6. Compare to list below to ensure they are at same release.
  7. If you update the Server you should connect to the Web User Interface and download the latest VMware Infrastructure Client.

Latest Install ISO is VMware ESXi 3.5 Installable Update 4 Build Number: 153875
Released: (2009.03.20)

ESXe350-200907401-O-SG – PATCH Build 176894 (2009.05.28) – VIC 147633 – Tools 176894 <– Latest Patch

ESXe350-200906401-O-BG – PATCH Build 169697 (2009.05.28) – VIC 147633 – Tools 169697

ESXe350-200905401-O-BG – PATCH Build 163429 (2009.05.28) – VIC 147633 – Tools 158874
ESXe350-200904401-O-SG – PATCH Build 158874 (2009.04.29) – VIC 147633 – Tools 158874
ESXe350-200904201-O-SG – PATCH Build 158869 (2009.04.10) – VIC 147633 –
ESXe350-200903201-O-UG – UPDATE Build 153875 (2009.03.30) – VIC 147633 <– Update 4
ESXe350-200903411-O-BG – PATCH Build 153840 (2009.03.20) – VIC 119801
ESXe350-200901401-O-SG – PATCH Build 143129 (2009.01.30) – VIC 143129
ESXe350-200811401-O-SG – PATCH Build 130755 (2009.12.02) – VIC 119801
ESXe350-200810401-O-UG – UPDATE Build 123629 (2008.11.17) – VIC 119801 Update 3

The typical way to apply patches to ESXi hosts is through the VMware Update Manager. For details, see the VMware Update Manager Administration Guide.

ESXi hosts can also be updated by downloading the most recent “O” (offline) patch bundle from http://support.vmware.com/selfsupport/download/ and installing the bundle using VMware Infrastructure Update or by using the vihostupdate command through the Remote Command Line Interface (RCLI). For details, see the ESX Server 3i Configuration Guide and the ESX Server 3i Embedded Setup Guide (Chapter 10, Maintaining ESX Server 3i and the VI Client) or the ESX Server 3i Installable Setup Guide (Chapter 11, Maintaining ESX Server 3i and the VI Client).

Note: ESXi hosts do not reboot automatically when you patch with the offline bundle.

Reference:

http://support.vmware.com/selfsupport/s3portal.portal?_nfpb=true&_windowLabel=SearchPatch&SearchPatch_actionOverride=%2Fportlets%2Fpatchupdate%2FfindPatchByProductVersion&_pageLabel=s3portal_pages_downloadPatch_page&version=3.5&product=ESXi%20(Embedded%20and%20Installable)

2009/06/20

virtualized active directory domain services

Filed under: virtualization — Tags: , , , , — iben @ 00:21

There are many customers we’re setup with virtualized active directory domain controllers. Windows 2003 at first and now Windows 2008 both work fine as Virtualized Domain Controllers.

Here are some of the links and notes that help as references…

–> http://www.vmware.com/files/pdf/Virtualizing_Windows_Active_Directory.pdf

An anti-affinity DRS rule is used when you want to keep 2 virtual machines on separate hosts when they provide a redundant service and locating them on the same host would eliminate that redundancy.

–>http://vmprofessional.com/2009/06/drs-and-anti-affinity-rules.html

The Virtual Machine on 64-Bit Windows Server

If using the x64 version of Windows Server 2003 or 2003 R2, one of the primary goals will be to contain the entire Active Directory database within the virtual machine’s RAM cache. On 64-bit Windows, employing 16 GB of RAM cache will accommodate a database of approximately 2.5 million users.
Caching the Active Directory database in 64-bit Windows will avoid performance hits related to certain disk operations. For a virtual machine that is a domain controller, adding, modifying, searching, deleting and update operations generally benefit significantly from caching. Write operations will always incur a slight penalty, regardless of whether a domain controller is running on a physical or virtual machine.
There is limited benefit for filling cache on 32-bit Windows for customers with large directories; in fact, in some cases this actually can exhaust kernel resources.

–> http:/viops.vmware.com/home/docs/DOC-1223

–> http:/xtravirt.com/xd10095
First Published: 17 June 2009
Windows 2008 Server and Windows 2008 Server R2 further refine the functionality with the service being renamed Active Directory Domain Services.

–> http://support.microsoft.com/kb/875495/
This article describes a condition that occurs when a domain controller that is running Microsoft Windows 2000 or Microsoft Windows Server 2003 starts from an Active Directory database that has been incorrectly restored or copied into place. This condition is known as an update sequence number rollback, or USN rollback. When a USN rollback occurs, modifications to objects and attributes that occur on one domain controller do not replicate to other domain controllers in the forest. Because replication partners believe that they have an up-to-date copy of the Active Directory database, monitoring and troubleshooting tools such as Repadmin.exe do not report any replication errors.

–> http://download3.vmware.com/vmworld/2006/tac9710.pdf
Here is a link to a VMworld 2006 Presentation titled TAC 9710 –
Virtualizing a Windows Active Directory Domain Infrastructure:
* Clock synchronization
* Network performance
* Multi-master replication model
* Security
* Potential single point of failure
* Disaster recovery

–> http://technet.microsoft.com/en-us/library/dd348449.aspx?ppud=4

# To help prevent a potential update sequence number (USN) rollback situation, see Appendix A: Virtualized Domain Controllers and Replication Issues.

–> http://technet.microsoft.com/en-us/library/dd348479(WS.10).aspx

— I b e n
iben.rodriguez – gmail
Follow me on http://twitter.com/iben

2009/06/15

Installing ESX or ESXi on older hardware

Filed under: virtualization — Tags: , , , — iben @ 16:13

I recently had opportunity to install VMware ESX on some old Dell hardware. These notes helped me move through the process.

VM-Help database of links: http://www.vm-help.com/esx/esx3.5/Whiteboxes_SATA_Controllers_for_ESX_3.5_3i.htm

How to enter nocheckCPUIDLimit on ESX with screen shots – http://communities.vmware.com/message/1136449#1136449
This is a two step process. Once for initial install from cd-rom and once for rebooting off hard drive. I did have to tweak it as it did not work 100% as advertised (see BrennanB post on April 27th).

Please let me know what other links worked for you and your old hardware.  Be sure to update vm-help with any feedback too!

I b e n

2009/04/30

TECHNOTE: VMware Converter Standalone v4

Filed under: virtualization — Tags: , , , , , — iben @ 07:55

VMware Converter Standalone

VMware converter is used for migrating Physical servers to Virtual Machines, Virtual Machines to Virtual Machines.

Directions for conducting a V2V or P2V for Windows Servers

1. Update or Open a tracking ticket to track progress
2. Ensure system is documented and monitored on portal
3. Notify stakeholders via DL – setup DL if needed
4. Login to the Machine to be converted
5. Run defrag and diskcheck if possible
6. Run Microsoft Update
7. Do a reboot test to ensure machine stability
8. Download VMware Converter Standalone version 4 – VMware-converter-4.0.0-146302.exe
9. Download Sysprep tools – unzip but do not run
10. Download NewSID – unzip but do not run
11. Download and run BGinfo – apply
12. Download and run treesize free and clean up unneeded files
13. Install VMware Converter
14. Copy Sysprep files to correct location – c:\documents and settings\all users
15. Launch VMware Converter
16. Import Machine
17. Select the device type; Physical Computer, Virtual Computer from ESX or VMware Workstation.
18. Enter in the remote IP address of the target:
19. Do not select Automatically uninstall the files when the import is successful
20. Select all the drives you wish to migrate to the new Virtual Machine
21. Select ESX or Virtual Center
22. Enter the Virtual Center and user credentials
23. Select the Virtual Machine name
24. Select the ESX host
25. Select the appropriate DataStore
26. Select the appropriate network
27. Check the box install vmware tools
28. If you desire to customize the settings, check the box.
29. Select Finish
30. When completed test new machine and configure.
31. Run newsid if new host names is needed… Keep in mind you cannot have two machines with same name or IP on same network.
32. Run BGinfo and apply again.
33. Verify reboot test and monitoring is functioning.
34. Verify system time.
35. Adjust services as needed.
36. Remove old hardware’s software.
37. Notify stakeholders when old machine is off and new machine is on.

See also: http://communities.vmware.com/thread/129871

2009/04/16

VMware ESX host command line configuration script

Filed under: Uncategorized — Tags: , , , , — iben @ 14:46

#customize esxXX by IR Date YYYYMMDD
# ESX host configuration script for company.com
# configure as needed for esxXX by changing IP addresses below…
# configure 4 nics for nfs storage
# nic 1 and 3 – cos1, vms, vmotion
# nic 2 and 4 – vmkernel for nfs storage
#

#configure SYSLOG
echo “*.* @syslog.site.company.com” >> /etc/syslog.conf
service syslog restart

# List current config
/usr/sbin/esxcfg-nics -l
/usr/sbin/esxcfg-vswitch -l

#creating virtual switches
/usr/sbin/esxcfg-vswitch -a vSwitch1
/usr/sbin/esxcfg-vswitch -L vmnic1 vSwitch1
/usr/sbin/esxcfg-vswitch -L vmnic3 vSwitch1
/usr/sbin/esxcfg-vswitch -L vmnic2 vSwitch0
#enable CDP advertise and listen mode
/usr/sbin/esxcfg-vswitch -b vSwitch0
/usr/sbin/esxcfg-vswitch -b vSwitch1
/usr/sbin/esxcfg-vswitch -B both vSwitch0
/usr/sbin/esxcfg-vswitch -B both vSwitch1
/usr/sbin/esxcfg-vswitch -b vSwitch0
/usr/sbin/esxcfg-vswitch -b vSwitch1

#creating portgroups
/usr/sbin/esxcfg-vswitch -A “ITG-VLAN2” vSwitch0
/usr/sbin/esxcfg-vswitch -A “PUBLIC-VLAN4” vSwitch0
/usr/sbin/esxcfg-vswitch -A “VMkVMotion-VLAN209” vSwitch0
/usr/sbin/esxcfg-vswitch -A “VMkStorage-VLAN207” vSwitch1
#/usr/sbin/esxcfg-vswitch -A “Service Console” vSwitch0
/usr/sbin/esxcfg-vswitch -A “Service Console 2” vSwitch0
/usr/sbin/esxcfg-vswif -a -i 10.102.8.111 -n 255.255.255.0 -p “Service Console 2” vswif1
/usr/sbin/esxcfg-vswitch -A “ESX-VLAN208” vSwitch0
/usr/sbin/esxcfg-vmknic -a -i 10.102.7.211 -n 255.255.255.0 VMkStorage-VLAN207
/usr/sbin/esxcfg-vmknic -a -i 10.102.9.211 -n 255.255.255.0 VMkVMotion-VLAN209
/usr/sbin/esxcfg-route -a 0.0.0.0/0 10.102.7.1
/usr/sbin/esxcfg-vswif -l
/usr/sbin/esxcfg-vmknic -l

vmware-vim-cmd hostsvc/net/vswitch_setpolicy –nicteaming-policy=loadbalance_ip vSwitch0
vmware-vim-cmd hostsvc/net/vswitch_setpolicy –nicteaming-policy=loadbalance_ip vSwitch1
vmware-vim-cmd /hostsvc/net/vswitch_setpolicy –failurecriteria-check-beacon 0 vSwitch0
vmware-vim-cmd /hostsvc/net/vswitch_setpolicy –failurecriteria-check-beacon 0 vSwitch1
vmware-vim-cmd hostsvc/net/vswitch_setpolicy –securepolicy-promisc=false vSwitch0
vmware-vim-cmd hostsvc/net/vswitch_setpolicy –securepolicy-macchange=false vSwitch0
vmware-vim-cmd hostsvc/net/vswitch_setpolicy –securepolicy-forgedxmit=false vSwitch0
vmware-vim-cmd hostsvc/net/vswitch_setpolicy –securepolicy-promisc=false vSwitch1
vmware-vim-cmd hostsvc/net/vswitch_setpolicy –securepolicy-macchange=false vSwitch1
vmware-vim-cmd hostsvc/net/vswitch_setpolicy –securepolicy-forgedxmit=false vSwitch1

#configuring vlans
/usr/sbin/esxcfg-vswitch -l
/usr/sbin/esxcfg-vswitch -v 2 -p “ITG-VLAN2” vSwitch0
/usr/sbin/esxcfg-vswitch -v 4 -p “PUBLIC-VLAN4” vSwitch0
/usr/sbin/esxcfg-vswitch -v 207 -p “VMkStorage-VLAN207” vSwitch1
/usr/sbin/esxcfg-vswitch -v 209 -p “VMkVMotion-VLAN209” vSwitch0
/usr/sbin/esxcfg-vswitch -v 208 -p “Service Console” vSwitch0
/usr/sbin/esxcfg-vswitch -v 208 -p “Service Console 2” vSwitch0
/usr/sbin/esxcfg-vswitch -v 208 -p “ESX-VLAN208” vSwitch0
/usr/sbin/esxcfg-vswitch -l

#delete vmnic1 from vSwitch0 (run these if necessary)
#/usr/sbin/esxcfg-vswitch -N vmnic1 -p “ITG-VLAN2” vSwitch0
#/usr/sbin/esxcfg-vswitch -N vmnic1 -p “PUBLIC-VLAN4” vSwitch0
#/usr/sbin/esxcfg-vswitch -N vmnic1 -p “VMkStorage-VLAN207” vSwitch0
#/usr/sbin/esxcfg-vswitch -N vmnic1 -p “VMkVMotion-VLAN209” vSwitch0
#/usr/sbin/esxcfg-vswitch -N vmnic1 -p “Service Console” vSwitch0
#/usr/sbin/esxcfg-vswitch -N vmnic1 -p “Service Console 2” vSwitch0
#/usr/sbin/esxcfg-vswitch -N vmnic1 -p “ESX-VLAN208” vSwitch0

#add vmnics to each port group
/usr/sbin/esxcfg-vswitch -M vmnic2 -p “ITG-VLAN2” vSwitch0
/usr/sbin/esxcfg-vswitch -M vmnic2 -p “PUBLIC-VLAN4” vSwitch0
/usr/sbin/esxcfg-vswitch -M vmnic1 -p “VMkStorage-VLAN207” vSwitch1
/usr/sbin/esxcfg-vswitch -M vmnic3 -p “VMkStorage-VLAN207” vSwitch1
/usr/sbin/esxcfg-vswitch -M vmnic2 -p “VMkVMotion-VLAN209” vSwitch0
/usr/sbin/esxcfg-vswitch -M vmnic2 -p “Service Console” vSwitch0
/usr/sbin/esxcfg-vswitch -M vmnic2 -p “Service Console 2” vSwitch0
/usr/sbin/esxcfg-vswitch -M vmnic2 -p “ESX-VLAN208” vSwitch0
/usr/sbin/esxcfg-vswitch -l

sleep 10

#setup vmotion on the first vmk network
#vmware-vim-cmd “hostsvc/vmotion/netconfig_get” (check config)
vmware-vim-cmd hostsvc/vmotion/vnic_set vmk1

#/usr/sbin/esxcfg-vswitch -l

vmware-vim-cmd /hostsvc/net/portgroup_set –nicorderpolicy-active=vmnic0 vSwitch0 “Service Console”
vmware-vim-cmd /hostsvc/net/portgroup_set –nicorderpolicy-standby=vmnic2 vSwitch0 “Service Console”
vmware-vim-cmd /hostsvc/net/portgroup_set –nicorderpolicy-active=vmnic0 vSwitch0 “Service Console 2”
vmware-vim-cmd /hostsvc/net/portgroup_set –nicorderpolicy-standby=vmnic2 vSwitch0 “Service Console 2”
vmware-vim-cmd /hostsvc/net/portgroup_set –nicorderpolicy-active=vmnic0 vSwitch0 “VMkVMotion-VLAN209”
vmware-vim-cmd /hostsvc/net/portgroup_set –nicorderpolicy-standby=vmnic2 vSwitch0 “VMkVMotion-VLAN209”

#adding Network Attached data store
/usr/sbin/esxcfg-nas -l
/usr/sbin/esxcfg-nas -a -o NAS1-ip -s /vol/vmw_datastore1 vmw_datastore1
/usr/sbin/esxcfg-nas -a -o NAS2-ip -s /vol/vmw_datastore2 vmw_datastore2
#/usr/sbin/esxcfg-nas -a -o NAS3-ip -s /vol/vol3_vmware_test nfs_vol_netapp
/usr/sbin/esxcfg-nas -l

#configure resolv.conf
/bin/cat /dev/null > /etc/resolv.conf
echo “nameserver ns1-ip” >> /etc/resolv.conf
echo “nameserver ns2.ip” >> /etc/resolv.conf
echo “search site.company.com” >> /etc/resolv.conf
cat /etc/resolv.conf

#configure hostname
vmware-vim-cmd hostsvc/net/dns_set –dns-hostname=esxXX
vmware-vim-cmd hostsvc/net/dns_set –dns-domainname=site.company.com

#configure NTP
/usr/sbin/esxcfg-firewall -e ntpClient
/usr/sbin/ntpdate -u ntp1.site.company.com
chkconfig –list ntpd
chkconfig –level 35 ntpd on
chkconfig –list ntpd
echo “restrict ntp1-ip mask 255.255.255.255 nomodify notrap noquery” >> /etc/ntp.conf
echo “server ntp1.site.company.com” >> /etc/ntp.conf
echo “restrict ntp2-ip mask 255.255.255.255 nomodify notrap noquery” >> /etc/ntp.conf
echo “server ntp2.site.company.com” >> /etc/ntp.conf
echo “restrict ntp3-ip mask 255.255.255.255 nomodify notrap noquery” >> /etc/ntp.conf
echo “server ntp3.site.company.com” >> /etc/ntp.conf
echo “driftfile /var/lib/ntp/drift” >> /etc/ntp.conf
echo “ntp1-ip” > /etc/ntp/step-tickers
echo “ntp2-ip” >> /etc/ntp/step-tickers
echo “ntp3-ip” >> /etc/ntp/step-tickers
service ntpd restart
hwclock –systohc

#configure SUDO

esxcfg-boot -g
esxcfg-boot -b

esxcfg-advcfg -s 32 /NFS/MaxVolumes

# make sure that NFS locks are not disabled
esxcfg-advcfg -s 0 /NFS/LockDisable

# this should already be set correctly, but just to make sure
esxcfg-advcfg -s 12 /NFS/HeartbeatFrequency

# this should also be set correctly already
esxcfg-advcfg -s 10 /NFS/HeartbeatMaxFailures

# increase the heap size. Default is 9.
esxcfg-advcfg -s 30 /Net/TcpIpHeapSize

# increase heap max. Default is 30.
esxcfg-advcfg -s 120 /Net/TcpIpHeapMax

#configure AD
/usr/sbin/esxcfg-auth –enablead –addomain=site.company.com –addc=DC-NAME.site.company.com
useradd IT1
useradd IT2
#useradd Administrator

#configure SNMP
/bin/cat /dev/null > /etc/snmp/snmpd.conf
echo “syscontact IT-TEAM-DL@company.com” >> /etc/snmp/snmpd.conf
echo “syslocation Company-Location” >> /etc/snmp/snmpd.conf
echo “rocommunity RO-String” >> /etc/snmp/snmpd.conf
echo “trapcommunity RO-String” >> /etc/snmp/snmpd.conf
echo “trapsink DELL-IT-Assistant-Server.site.company.com RO-String” >> /etc/snmp/snmpd.conf
echo “dlmod SNMPESX /usr/lib/vmware/snmp/libSNMPESX.so” >> /etc/snmp/snmpd.conf
echo “smuxpeer .1.3.6.1.4.1.674.10892.1” >> /etc/snmp/snmpd.conf

#install Dell OpenManage Agent
esxcfg-firewall -o 80,tcp,out,http
/usr/bin/lwp-download http://DELL-IT-Assistant-Server.site.company.com/OM_5.5.0_ManNode_A00.targz
tar -xvf OM_5.5.0_ManNode_A00.tar.gz
cd linux/supportscripts/
./srvadmin-install.sh -b -w -r -s
srvadmin-services.sh start
esxcfg-firewall -o 1311,tcp,in,OpenManageRequest

#test by going to https://esxXX.site.company.com:1311

# service mgmt-vmware restart # if needed

#end of script
2009/04/08

NetApp A-SIS DeDuplication for VMware ESX Virtual Machines using NFS

Filed under: virtualization — Tags: , , , , , , — iben @ 21:06

I just wanted to share with you all. We are using a small NetApp with NFS for hosting ESX 3.5 Update 4 and ESX 4 RC Virtual Machines.

MODEL: FAS2020-R5
SW VERSION: 7.2.4L1

We have about 9 Windows VMs each one using about 20 GB disk space. There are Active Directory Domain Controllers, Exchange 2003 and 2007 servers, Windows Administration and Application servers and workstations and even Solaris 10 and Windows 2008 64 bit machines.

# du -h vmnfs/
21G vmnfs/vhq/dc1
21G vmnfs/vhq/dc2
21G vmnfs/vhq/vc
21G vmnfs/vhq/wadmin
8.6G vmnfs/vhq/w2008
91G vmnfs/vhq
31G vmnfs/eng/solaris10
31G vmnfs/eng
21G vmnfs/W2K3template
21G vmnfs/SW-Node01
21G vmnfs/SW-Node02

If we include the snapshots there is 1.6TB of data available and being served up with only 21GB of disk space being used!

> df -h /vol/vmnfs
Filesystem total used avail capacity Mounted on
/vol/vmnfs/ 400GB 21GB 378GB 5% /vol/vmnfs/

> df -sh /vol/vmnfs
Filesystem used saved %saved
/vol/vmnfs/ 21GB 160GB 88%

> man nfs
The disk space savings generated by the shared space is
shown in the saved column. The space used plus the space
saved would be the total disk space usage, if no space was
shared. The %saved is calculated as [saved / (used + saved)].

Below is a list of the maximum volume size for each storage system:

Storage system (with nearstor_option enabled) Max. A-SIS deduplication volume size
FAS6070, FAS6080, N7800 16TB
FAS6030, FAS6040, N7600 10TB
FAS3070, N5600 6TB
NearStore R200 4TB
FAS3040, N5300 3TB
FAS3050, N5500 2TB
FAS3020, N5200 1TB
FAS2050 1TB
FAS2020 0.5TB

You can use MRTG to graph the disk space saved by A-SIS deduplication by volume name.

http://www.usenet-forums.com/mrtg/392860-mrtg-mrtg-ntap-probe-release-0-5-0-sis-disk-space-savingsreport-added.html

What has your experience been with using A-SIS from NetApp with ESX hosts over NFS?

2009/04/07

VMware ESX setting static mac addresses

Filed under: Uncategorized — Tags: , , , , — iben @ 15:22

1. Select a static MAC. NOTE: Static MAC addresses must be in the range of 00:50:56:00:00:00-00:50:56:3F:FF:FF to work with this procedure.
2. Remember to record the Static MAC addresses registered for future reference.
3. Unregister vm:
4. Note the datastore, vm inventory folder, and name for the vm in the summary tab
5. Power down the virtual machine
6. Right click the vm and select remove from inventory
7. Edit vmx:
8. Ssh to the esx host system (use putty)
9. cd /vmfs/volumes/
10. cd to the system’s folder
11. cp .vmx to .vmx.bak
12. vi .vmx
13. find the ethernet0 section
14. make the following changes:
15. change ethernet0.addressType = “vpx” to ethernet0.addressType = “static”
16. ethernet0.generatedAddress = “00:50:56:01.01.00” to ethernet0.address = “00:50:56:01.01.00”
17. rearrange so the following items are in this order and grouped together: ethernet0.address, ethernet0.addresstype, uuid.location, uuid.bios
18. Write the changes to the disk and exit
19. Reregister the vm:
20. In virtual center, browse to the host datastore (configuration, storage, double click on the vm’s datastore)
21. Browse to the edited .vmx file
22. Right click the .vmx file and select Add to Inventory
23. Enter the system name
24. Select the host
25. Select the resource pool
26. Click Finish
27. Power on the vm and verify the mac address
28. Windows: ipconfig /all find “Physical Address”
29. Linux: ifconfig /a grep Hwaddr

EXAMPLE

ethernet0.address = “00:50:56:88:6f:98”

ethernet0.addressType = “static”

uuid.location = “56 4d 6b b4 70 cc 85 24-59 1b 2d 24 0a 2b d7 7a”

uuid.bios = “50 08 5b 0d e1 f7 fb 8b-ba 39 74 1b 30 fc 0c 40”

Posted by Jae Ellers at Monday, January 28, 2008.
http://vmprofessional.com/2008/01/setting-static-mac-addresses.html

This post rocks! Helped me out of a tight bind today.

ESX versus ESXi – feature comparison – Dell Open Manage

Filed under: virtualization — Tags: , , , , , , — iben @ 11:55

The following information was obtained from Dell’s web site:
http://support.dell.com/support/edocs/software/eslvmwre/Systems_Mngmnt/ESXi_MNGMNT/HTML/body.htm

Monitoring Comparison between ESX and ESXi

Systems Management
Feature Description: Inventory
Processor Information including brand, processor version, current speed, core count, model, stepping information, 64-bit support, HyperThreading (HT), Virtualization Technology (VT), Demand Based Switching (DBS), and Execute Disable (XD).
Cache information including status, level, max size, installed size, type, location, write policy, set associativity, and error correction.

ESX Classic
All of the above Inventory information is available through OpenManage Server Administrator.

Processor brand, processor version, current speed, core count, model, and stepping information is also available in IT Assistant

ESXi
Only Processor brand, processor version, current speed, core count, and model available using the VI Client.

« Newer PostsOlder Posts »

Powered by WordPress